

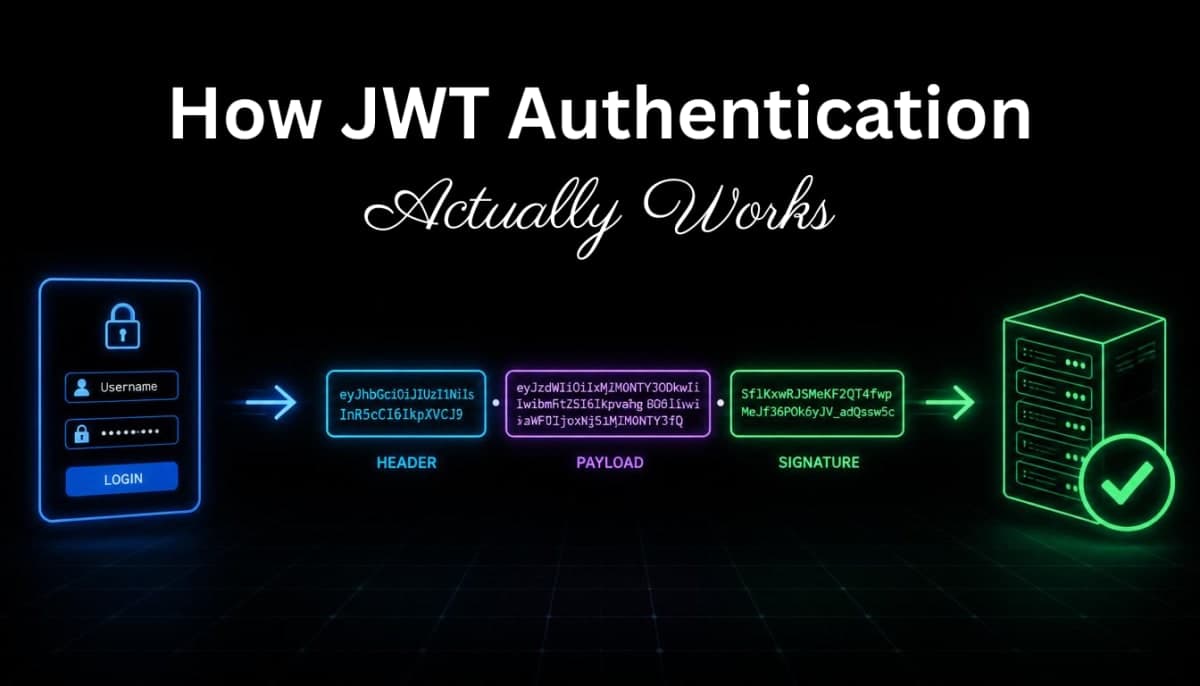
How JWT Authentication Actually Works - Explained Properly
Most developers use JWT without really understanding how it works. This blog explains what's inside a JWT, how signature verification works without a database call, and how to implement it properly in Express with refresh tokens and role-based authorization.
If you've built any kind of API that needs authentication, you've probably used JWT or at least heard of it. Most developers know enough to copy a working example, generate a token on login, and verify it on protected routes. But if someone asked you to explain what's actually inside that token, how the verification works without a database call, or what happens if someone tries to tamper with it - could you answer that clearly?
This blog covers all of that. Not just how to implement JWT, but how it actually works underneath, so you can use it confidently and understand the security decisions you're making.
The Problem JWT Solves
Before getting into what JWT is, it helps to understand why it exists.
HTTP is stateless. Every request your server receives is completely independent - the server has no memory of previous requests by default. So when a user logs in and then makes a request to a protected route, the server has no built-in way to know that this request is coming from someone who already authenticated.
The traditional solution to this is sessions. When a user logs in, the server creates a session, stores it in memory or a database, and sends back a session ID in a cookie. On every subsequent request, the browser sends that cookie, the server looks up the session ID in storage, finds the user, and proceeds.
This works, but it has a real limitation. Every request requires a database lookup to validate the session. At scale, this adds up. It also gets complicated when you have multiple servers - if a user's session is stored on Server A, requests that hit Server B won't find it.
JWT takes a different approach. Instead of storing session data on the server, the server gives the client a token that contains the user information itself. The client sends this token on every request, and the server can verify it and read the user data from it - without touching a database at all.
What a JWT Actually Is
JWT stands for JSON Web Token. It's a string that looks like this:
eyJhbGciOiJIUzI1NiIsInR5cCI6IkpXVCJ9.eyJpZCI6MSwiZW1haWwiOiJyYWh1bEBleGFtcGxlLmNvbSIsInJvbGUiOiJ1c2VyIiwiaWF0IjoxNzE2MDAwMDAwLCJleHAiOjE3MTYwODY0MDB9.SflKxwRJSMeKKF2QT4fwpMeJf36POk6yJV_adQssw5c
It looks like gibberish but it's actually three distinct parts separated by dots. Each part is Base64URL encoded - meaning it's just regular data encoded into a URL-safe string format. It's not encrypted. Anyone can decode it and read what's inside.
The three parts are the header, the payload, and the signature.
Part 1 - The Header
{
  "alg": "HS256",
  "typ": "JWT"
}
The header tells you what type of token this is and which algorithm was used to create the signature. HS256 means HMAC with SHA-256, which is the most common signing algorithm for JWTs.
Part 2 - The Payload
{
  "id": 1,
  "email": "rahul@example.com",
  "role": "user",
  "iat": 1716000000,
  "exp": 1716086400
}
This is the actual data. The fields you put here are called claims. Some are standard - iat is "issued at" (a Unix timestamp of when the token was created) and exp is "expires at" (when the token stops being valid). Everything else is custom data you add based on what your application needs.
iat and exp are Unix timestamps - seconds since January 1, 1970. The difference between those two timestamps above is 86400 seconds, which is exactly 24 hours. So this token is valid for one day.
Part 3 - The Signature
This is the part that makes JWT secure. The signature is created by taking the encoded header, the encoded payload, a secret key that only your server knows, and running them through the hashing algorithm specified in the header.
HMACSHA256(
  base64UrlEncode(header) + "." + base64UrlEncode(payload),
  your-secret-key
)
The resulting signature is what gets appended as the third part of the token.
When your server receives a token, it takes the header and payload from that token, runs the same HMAC operation with its secret key, and compares the result to the signature in the token. If they match, the token is valid and hasn't been tampered with. If someone changed even a single character in the payload, the signature would no longer match.
This is the key insight: the server never needs to store the token or look it up in a database. It just needs its secret key to verify any token it receives. The math does the work.
The JWT Flow - How It Works in Practice
Here's the complete flow from login to accessing a protected route:
1. User sends email and password to POST /api/auth/login

2. Server checks credentials against the database
   - If wrong: return 401 Unauthorized
   - If correct: continue

3. Server creates a JWT containing the user's id, email, role
   Signs it with the secret key
   Sets an expiry time

4. Server sends the JWT back to the client

5. Client stores the token (localStorage or a cookie)
   Sends it in the Authorization header on future requests:
   Authorization: Bearer <token>

6. Server receives the request, extracts the token from the header
   Verifies the signature using the secret key
   Checks the expiry time
   If valid: reads the user data from the payload, processes the request
   If invalid or expired: return 401 Unauthorized
Notice that step 6 involves zero database calls for the verification itself. The server just does cryptographic verification. That's the performance advantage of JWT over session-based auth.
Building JWT Auth in Express - Step by Step
If you've set up an Express server following our Node.js and Express blog, this is how you add JWT authentication on top of it.
First install the jsonwebtoken package:
npm install jsonwebtoken bcryptjs
We're also installing bcryptjs because you should never store plain text passwords. We'll hash them before saving and compare hashes on login.
Setting up your secret key:
Your JWT secret key should be a long random string that only your server knows. Store it in an environment variable, never hardcode it.
JWT_SECRET=your-very-long-random-secret-key-here-make-it-at-least-32-characters
The login route - generating a token:
const express = require("express");
const jwt = require("jsonwebtoken");
const bcrypt = require("bcryptjs");
const router = express.Router();

// Simulated user database - in a real app this comes from your actual database
const users = [
  {
    id: 1,
    email: "rahul@example.com",
    // this is the bcrypt hash of "password123"
    password: "$2a$10$92IXUNpkjO0rOQ5byMi.Ye4oKoEa3Ro9llC/.og/at2.uheWG/igi"
  }
];

router.post("/login", async (req, res) => {
  try {
    const { email, password } = req.body;

    // find the user
    const user = users.find(u => u.email === email);
    if (!user) {
      return res.status(401).json({ error: "Invalid credentials" });
    }

    // compare the provided password with the stored hash
    const isPasswordValid = await bcrypt.compare(password, user.password);
    if (!isPasswordValid) {
      return res.status(401).json({ error: "Invalid credentials" });
    }

    // create the token
    const token = jwt.sign(
      {
        id: user.id,
        email: user.email
      },
      process.env.JWT_SECRET,
      { expiresIn: "24h" }
    );

    res.json({
      message: "Login successful",
      token
    });

  } catch (err) {
    res.status(500).json({ error: "Internal server error" });
  }
});

module.exports = router;
A few things worth explaining here. We return the same error message "Invalid credentials" whether the email doesn't exist or the password is wrong. This is intentional - if you returned different messages for each case, an attacker could use your login endpoint to figure out which emails are registered in your system. Keeping the error generic prevents that.
jwt.sign() takes three arguments - the payload (what to put in the token), the secret key, and options. The expiresIn option accepts a string like "24h", "7d", or "15m", or a number in seconds.
The authentication middleware:
This is what protects your routes. It runs before your route handler and either allows the request through or rejects it. If you want to understand middleware more deeply, we covered it in the Node.js and Express blog.
const jwt = require("jsonwebtoken");

function authenticate(req, res, next) {
  // get the token from the Authorization header
  const authHeader = req.headers.authorization;

  if (!authHeader || !authHeader.startsWith("Bearer ")) {
    return res.status(401).json({ error: "No token provided" });
  }

  const token = authHeader.split(" ")[1]; // extract the token after "Bearer "

  try {
    const decoded = jwt.verify(token, process.env.JWT_SECRET);
    req.user = decoded; // attach the decoded user data to the request
    next();
  } catch (err) {
    if (err.name === "TokenExpiredError") {
      return res.status(401).json({ error: "Token has expired" });
    }
    return res.status(401).json({ error: "Invalid token" });
  }
}

module.exports = authenticate;
jwt.verify() does two things at once - it verifies the signature and checks the expiry. If either fails, it throws an error. We catch that error and return an appropriate response. The TokenExpiredError check is useful because it lets the client know specifically that the token expired, so it can redirect to login rather than showing a generic error.
When verification succeeds, decoded contains the payload we put in the token - the user's id and email. We attach it to req.user so any route handler after this middleware can access it.
Using the middleware on protected routes:
const express = require("express");
const authenticate = require("../middleware/authenticate");
const router = express.Router();

// public route - no middleware
router.get("/public", (req, res) => {
  res.json({ message: "Anyone can see this" });
});

// protected route - requires valid token
router.get("/profile", authenticate, (req, res) => {
  // req.user is available here because authenticate attached it
  res.json({
    message: "This is your profile",
    user: req.user
  });
});

// protected route - only admins
router.delete("/users/:id", authenticate, authorizeAdmin, (req, res) => {
  res.json({ message: `User ${req.params.id} deleted` });
});

module.exports = router;
The authenticate middleware is passed directly as an argument before the route handler. Express calls them in order - first authenticate runs, and if it calls next(), then the route handler runs. If authenticate returns a 401, the route handler never runs at all.
Role-based authorization:
Authentication answers "who are you?" Authorization answers "what are you allowed to do?" They're different things. Here's a simple authorization middleware that checks for an admin role:
function authorizeAdmin(req, res, next) {
  if (req.user.role !== "admin") {
    return res.status(403).json({ error: "Admin access required" });
  }
  next();
}
Notice it returns 403 (Forbidden) not 401 (Unauthorized). The user is authenticated - we know who they are. They're just not permitted to do this specific thing. If you want a refresher on the difference between 401 and 403, we covered exactly this in the HTTP status codes blog.
Where to Store the Token on the Client Side
This is a security decision worth thinking about properly. You have two main options.
localStorage
Easy to use from JavaScript, persists across browser sessions. The downside is that it's accessible to any JavaScript running on your page. If your app has an XSS (Cross-Site Scripting) vulnerability - where an attacker can inject JavaScript into your page - they can steal tokens straight out of localStorage.
HttpOnly Cookies
Cookies with the HttpOnly flag cannot be accessed by JavaScript at all. They're automatically sent with every request to the same domain, and attackers cannot read them through XSS because JavaScript simply has no access to HttpOnly cookies. This makes them safer for storing auth tokens.
The tradeoff is that cookies require more setup and you need to handle CORS correctly - which we covered in detail in the CORS blog. Specifically, you need credentials: true in your CORS configuration and Access-Control-Allow-Credentials: true in your response headers for cookies to be sent on cross-origin requests.
For most applications, HttpOnly cookies are the more secure choice. For simpler APIs where XSS is well-controlled, localStorage is commonly used and works fine. Both have tradeoffs - the important thing is making the choice consciously, not just going with whatever the tutorial used.
Token Expiry and Refresh Tokens
Short-lived tokens are more secure. If a token gets stolen somehow, a 15-minute expiry means the attacker only has a 15-minute window to use it. But asking users to log in every 15 minutes is a bad experience.
The solution is a refresh token system. Here's how it works:
When a user logs in, the server issues two tokens:
An access token - short-lived (15 minutes to 1 hour), used for API requests
A refresh token - long-lived (7 to 30 days), used only to get new access tokens
The access token is what you send in the Authorization header on every request. When it expires, instead of redirecting to login, the client sends the refresh token to a special endpoint like POST /api/auth/refresh. The server validates the refresh token and issues a new access token.
router.post("/refresh", async (req, res) => {
  const { refreshToken } = req.body;

  if (!refreshToken) {
    return res.status(401).json({ error: "Refresh token required" });
  }

  try {
    const decoded = jwt.verify(refreshToken, process.env.JWT_REFRESH_SECRET);

    // issue a new short-lived access token
    const newAccessToken = jwt.sign(
      { id: decoded.id, email: decoded.email },
      process.env.JWT_SECRET,
      { expiresIn: "15m" }
    );

    res.json({ accessToken: newAccessToken });

  } catch (err) {
    return res.status(401).json({ error: "Invalid or expired refresh token" });
  }
});
Refresh tokens use a different secret key (JWT_REFRESH_SECRET) from access tokens. This way, even if one key is somehow compromised, the other isn't affected.
This pattern is used by most production authentication systems and gives you the security of short-lived tokens without constantly asking users to log in again.
What JWT Does Not Solve
JWT is not a complete authentication solution on its own and it's worth being clear about its limitations.
You cannot invalidate a JWT before it expires. This is the most cited limitation. Since the server doesn't store tokens, there's no way to say "this token is no longer valid" without waiting for it to expire naturally. If a user logs out, the token still technically works until it expires. If an account is compromised and you want to revoke access immediately, you can't without either maintaining a token blocklist (which adds back the database lookup you were trying to avoid) or using very short expiry times with refresh tokens.
The payload is readable by anyone. Base64URL encoding is not encryption. Anyone who has the token can decode and read its payload. Never put sensitive information in a JWT payload - no passwords, no credit card numbers, no private data. Only put what the server needs to identify and authorize the user.
The secret key must stay secret. If your JWT_SECRET is exposed, anyone can generate valid tokens for any user. Keep it in environment variables, rotate it if you think it's been compromised, and make it long and random.
Putting It All Together
Here's how your Express app structure looks with JWT auth added:
src/
- middleware/
    authenticate.js     (verifies token, adds req.user)
    authorizeAdmin.js   (checks role)
- routes/
    auth.js            (login, refresh)
    users.js           (protected routes using authenticate middleware)
- index.js             (main server file)
// index.js
const express = require("express");
const cors = require("cors");
const authRoutes = require("./routes/auth");
const userRoutes = require("./routes/users");

const app = express();

app.use(cors({ origin: "http://localhost:5173", credentials: true }));
app.use(express.json());

app.use("/api/auth", authRoutes);
app.use("/api/users", userRoutes);

app.use((err, req, res, next) => {
  console.error(err.stack);
  res.status(500).json({ error: "Internal server error" });
});

app.listen(3000, () => console.log("Server running on port 3000"));
Clean, organized, and each piece has a clear job. The CORS setup here directly uses what we covered in the CORS blog - specific origin and credentials enabled for cookie support.
The Mental Model Worth Keeping
JWT works because of cryptographic signatures, not storage. The server signs a token with a secret key. Anyone can read the token, but nobody can change it without invalidating the signature. The server verifies that signature on every request using the same secret key.
That's the whole system. The header says what algorithm was used. The payload carries the data. The signature proves nothing was tampered with.
Use short expiry times. Store tokens in HttpOnly cookies when security matters. Never put sensitive data in the payload. Keep your secret key actually secret.
Once you understand the mechanism, JWT stops feeling like magic and starts feeling like a sensible solution to a straightforward problem.
Related Articles
More insights you might enjoy

SSR, CSR, SSG, and ISR in Next.js - What They Are and When to Use Each One
Next.js gives you four ways to render pages and each solves a different problem. This guide explains all four with real code examples and a practical decision guide.

React vs Next.js: What's Actually Different and When to Use Which
React and Next.js are often confused - one is a UI library, the other is a full framework built on top of it. This post breaks down the real differences: rendering strategies, routing, API routes, and when to pick one over the other.

HTTP Status Codes Explained - What They Actually Mean and Why Developers Should Know Them
Most developers know 200 and 404. But understanding the full range - and when to use them in your own APIs - makes you a noticeably better backend developer.

How React's useEffect Actually Works - And Why Developers Misuse It
useEffect is one of the most used hooks in React and also one of the most misunderstood. This guide covers the dependency array, cleanup functions, the double render, and common mistakes that cause bugs.

Node.js and Express.js - What They Are, How They Differ, and How They Work Together
Node.js and Express.js are not the same thing. This guide explains what each does, how they work together, and covers routing, middleware, and error handling with real code.

TypeScript vs JavaScript - What Is Actually Different and Should You Learn TypeScript
TypeScript and JavaScript are more related than most people think. This guide covers the real difference, core TypeScript features you need to know, and helps you decide whether to make the switch.
Comments
Sign in to join the conversation